
The FSM Planner
Every tutorial so far has built a part: interfaces, equipment, conditions, states. The FSM Planner is where those parts become a machine — a drawing of which state runs when, and what has to be true to move on. And you do not have to build the parts first. Sketch the machine with placeholders, then press Construct Composite and StateTick creates every state and condition you named.
We will build a small line: two motors that run in turn, with an Idle state waiting for a start command. Three states, three conditions, one loop — and we will draw all of it before a single state exists.
The canvas
Open FSM Planner at the bottom of the project tree. You get a grid, and a toolbar of things you can drop onto it:
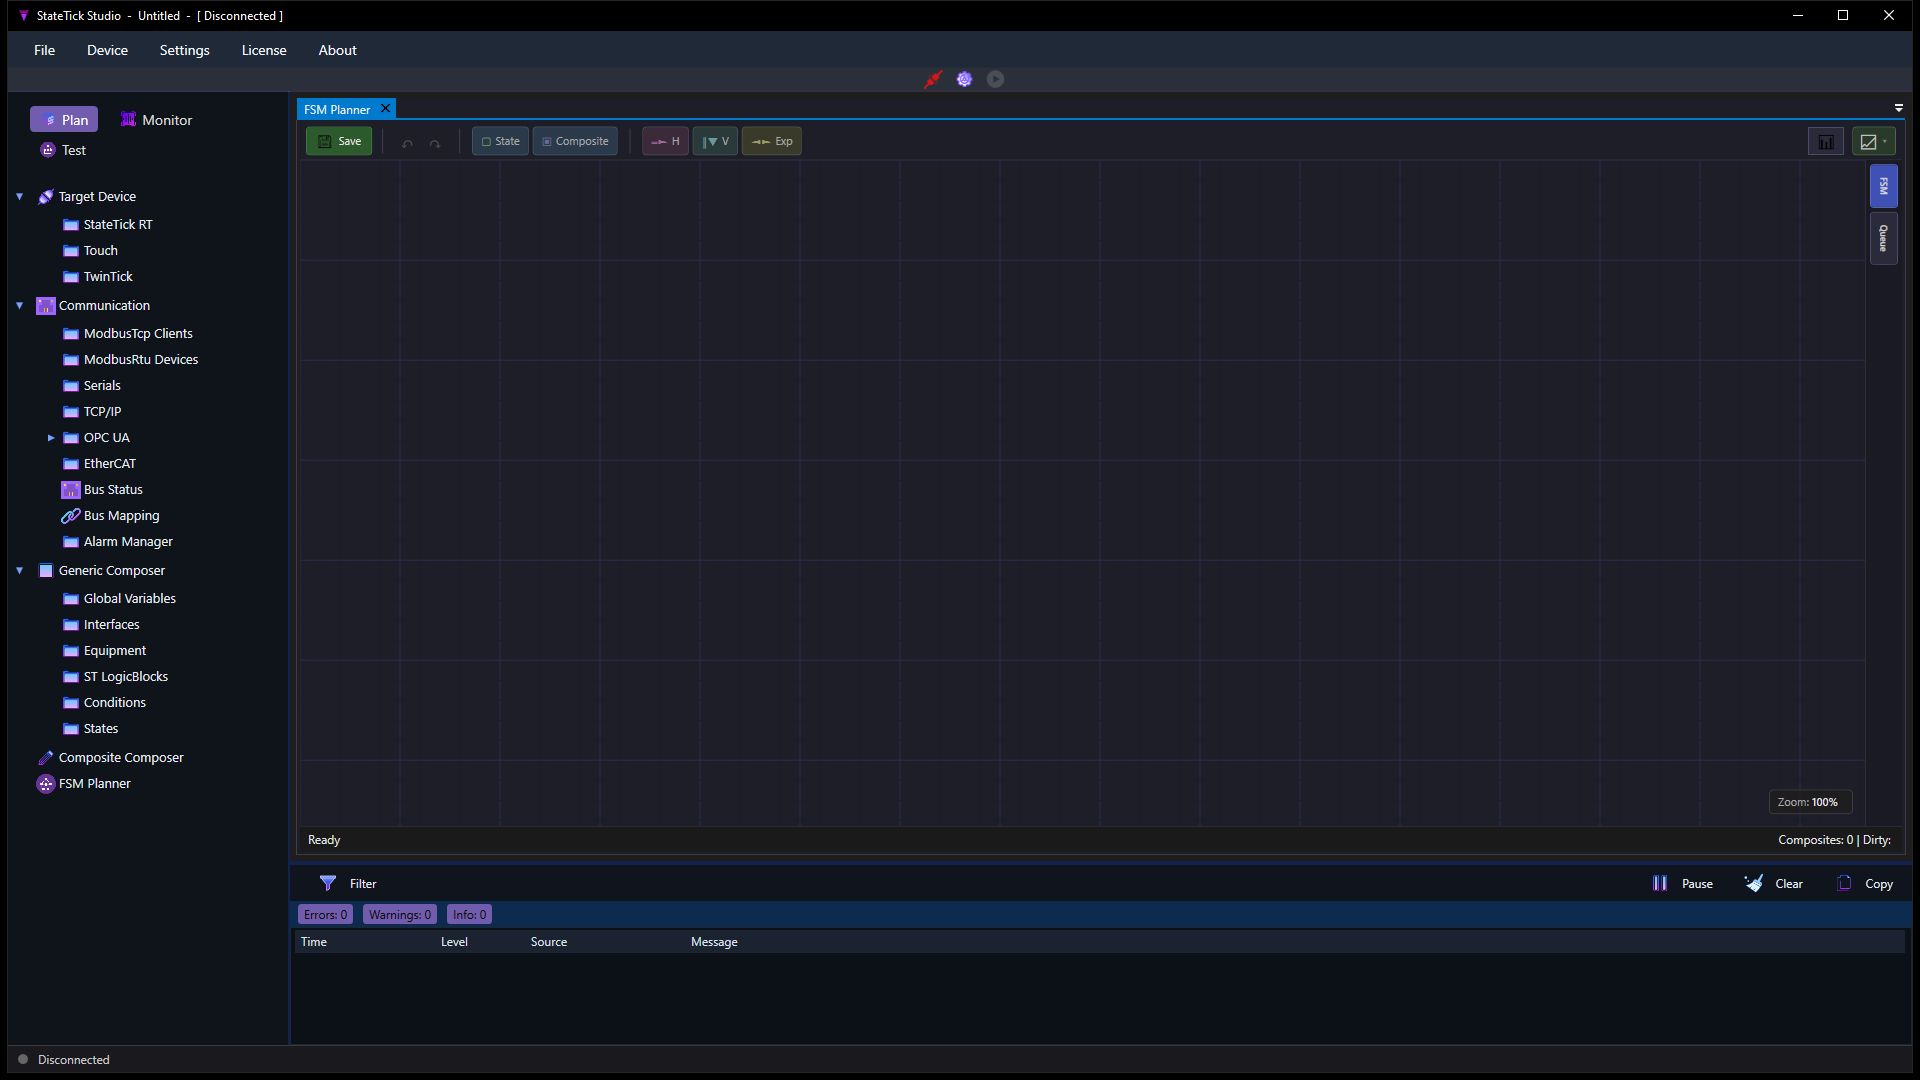

| Button | What it drops |
|---|---|
| Composite | A machine box. Everything else lives inside one. |
| State | A state node inside the selected composite. |
| Exp | An expander — fans one wire out to up to four branches. |
| H / V | A horizontal or vertical combiner — merges several wires into one target. |
Step 1 — Drop a composite
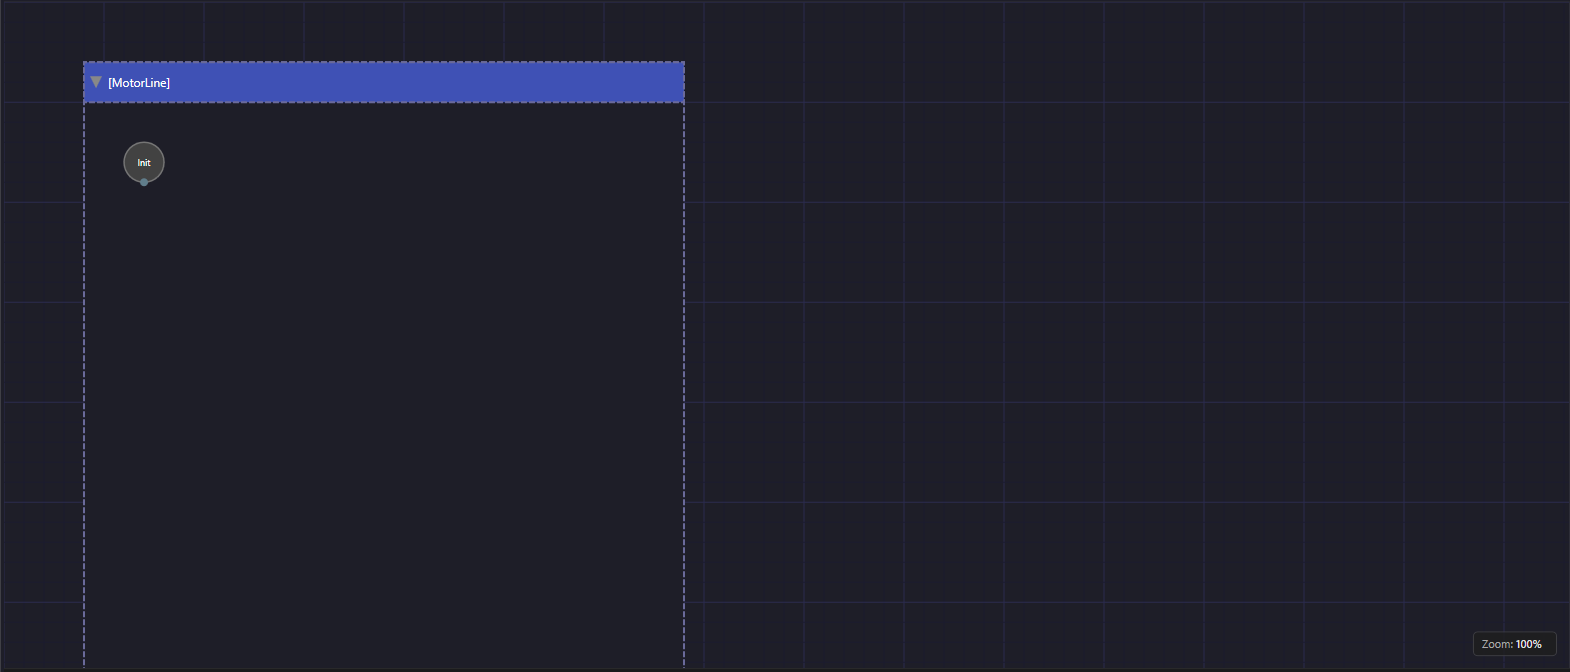
Drag Composite onto the canvas. Because nothing is assigned to it yet, it is a placeholder: its name shows in square brackets and its border is dashed. Name it MotorLine.
Notice the small Init circle in the corner. It is created with the composite, it cannot be deleted, and it is where the machine starts on the first scan.
Step 2 — Drop the states
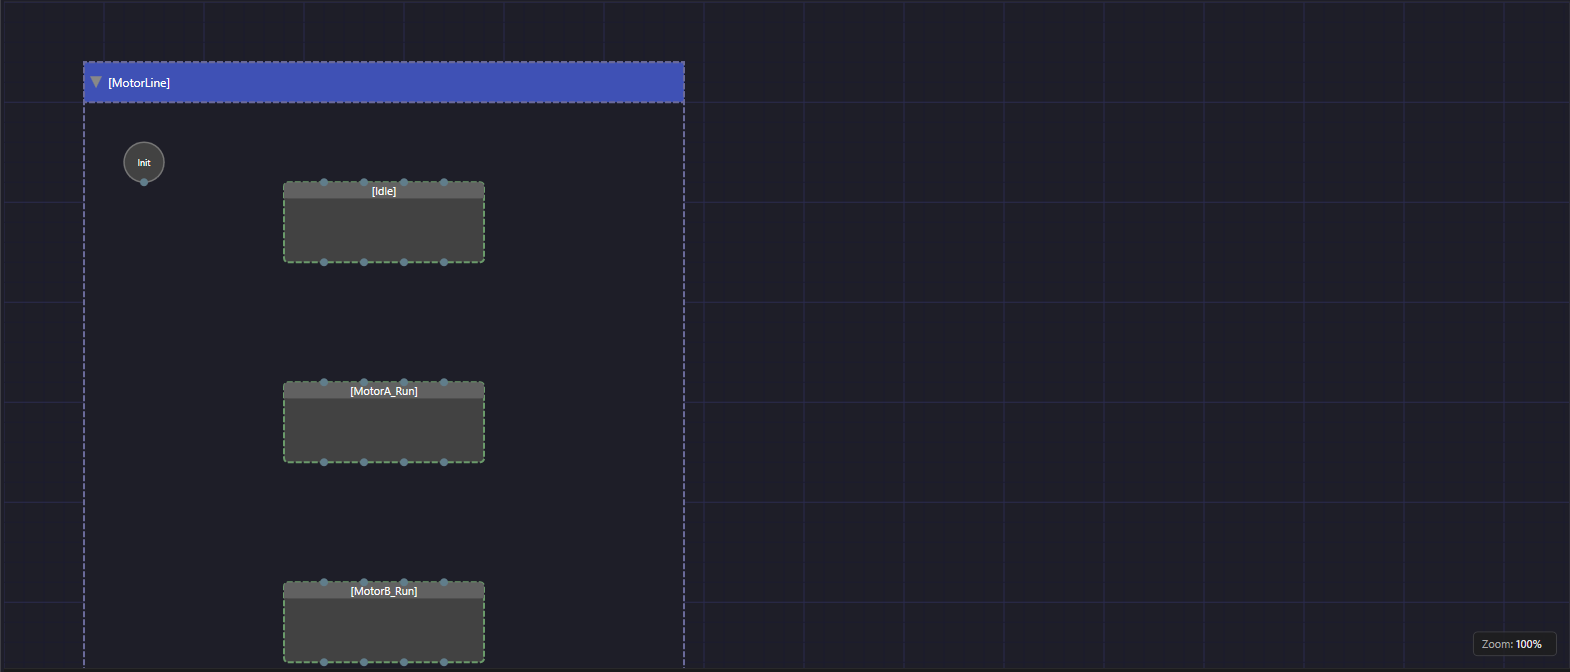
Now drop three State nodes inside the composite and name them. These are placeholders too — there is still nothing on the States page:
Idle— waiting for the start commandMotorA_Run— first motor turningMotorB_Run— second motor turning
Step 3 — Wire them up
Drag from a port on the bottom edge of one state to a port on the top edge of the next. Each wire carries a condition — the guard that has to be true before the machine moves. And the condition can be a placeholder as well: just type the name you wish existed.
Init→Idleon true — run this the moment the machine startsIdle→MotorA_Runon StartPressedMotorA_Run→MotorB_Runon MotorA_DoneMotorB_Run→Idleon MotorB_Done
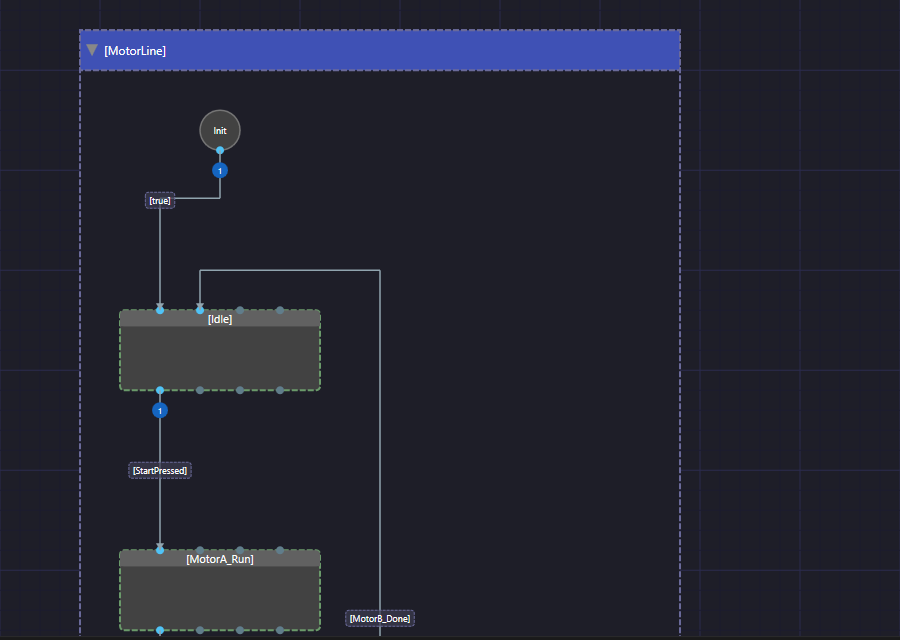
The numbered badge on each wire is its priority, and the planner assigns it for you as you draw — the first wire out of a state gets 1, the next gets 2, and so on. Priority decides evaluation order: when several wires leave the same state, the lowest number is checked first, and the first guard that is true wins. Every state here has one way out, so every wire is priority 1. Double-click a badge to renumber it — that is how you make a fault path beat a normal one.
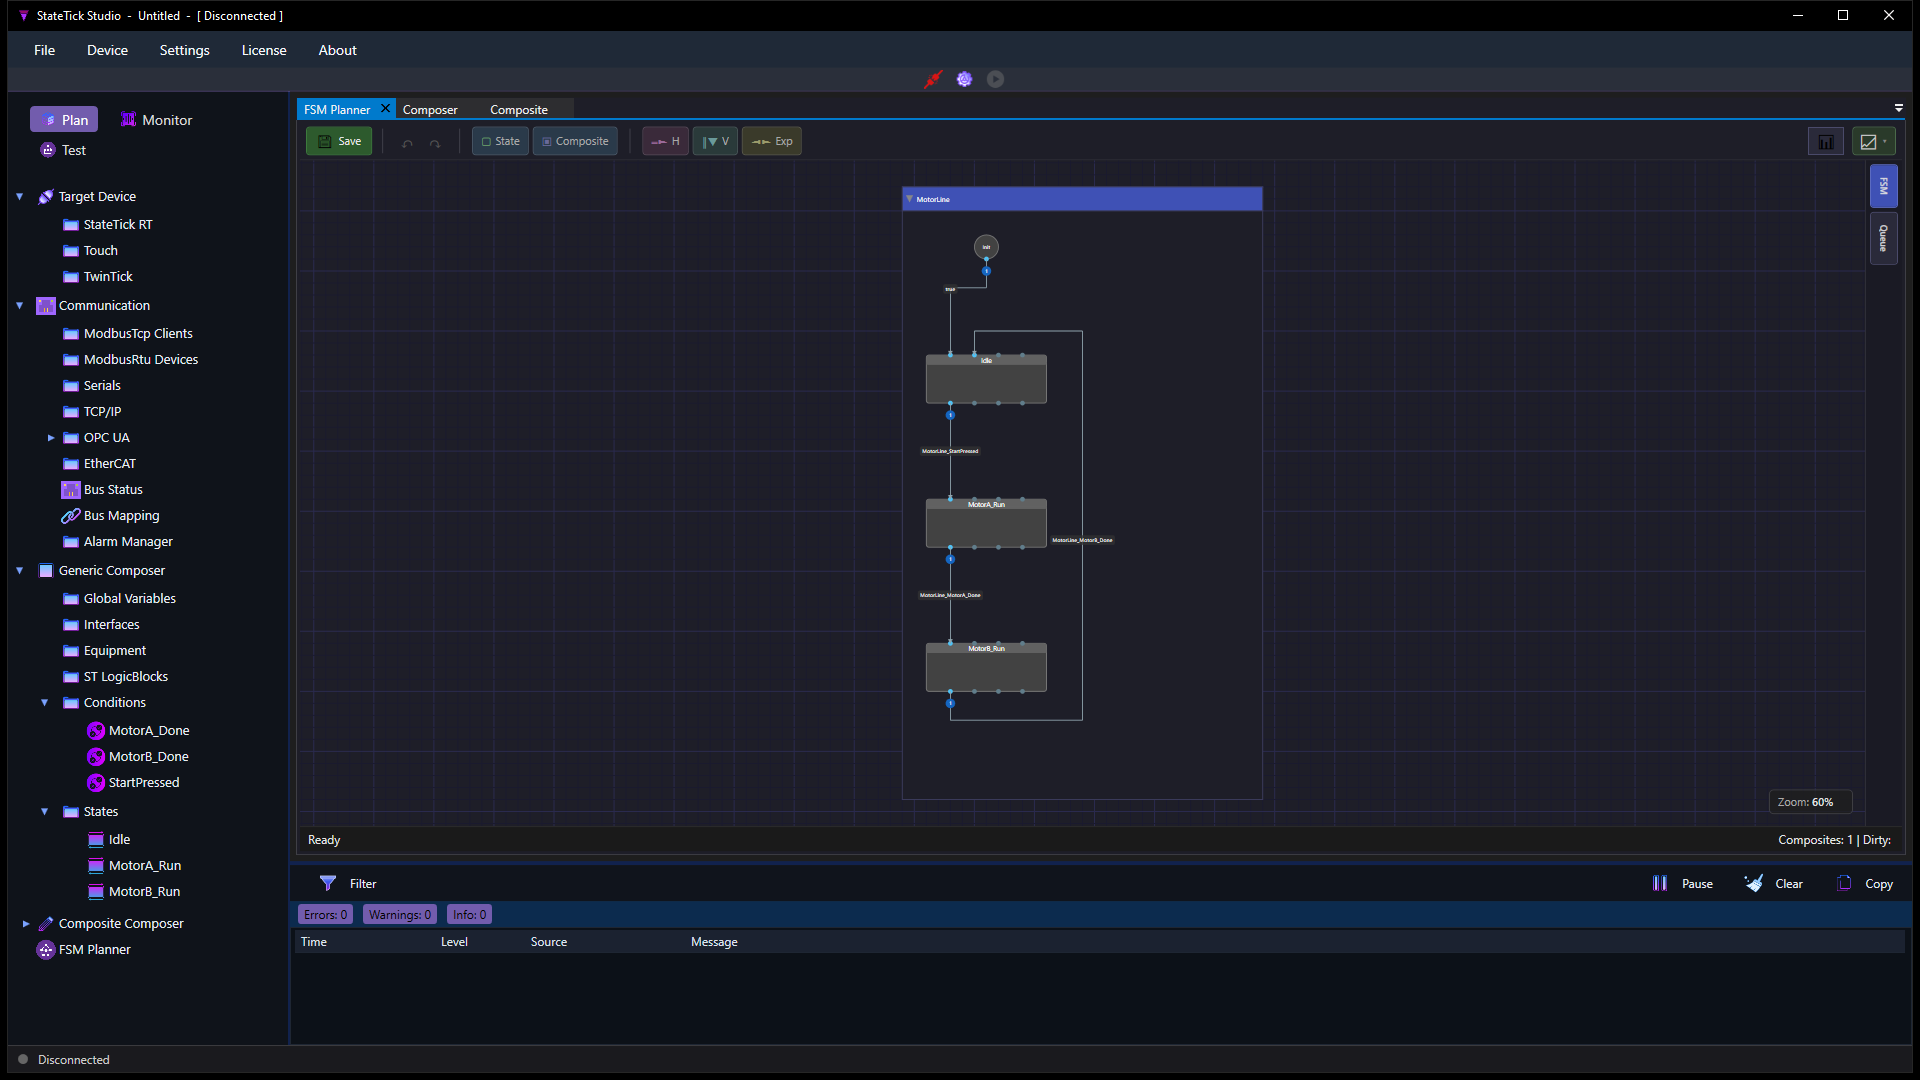
That last wire is the interesting one. MotorB_Run goes back up to Idle, and a wire that runs backwards cannot just be drawn through the middle of the diagram. The planner routes it out to a free lane at the side and brings it back in at the top — so the loop stays readable no matter how many states it has to pass:
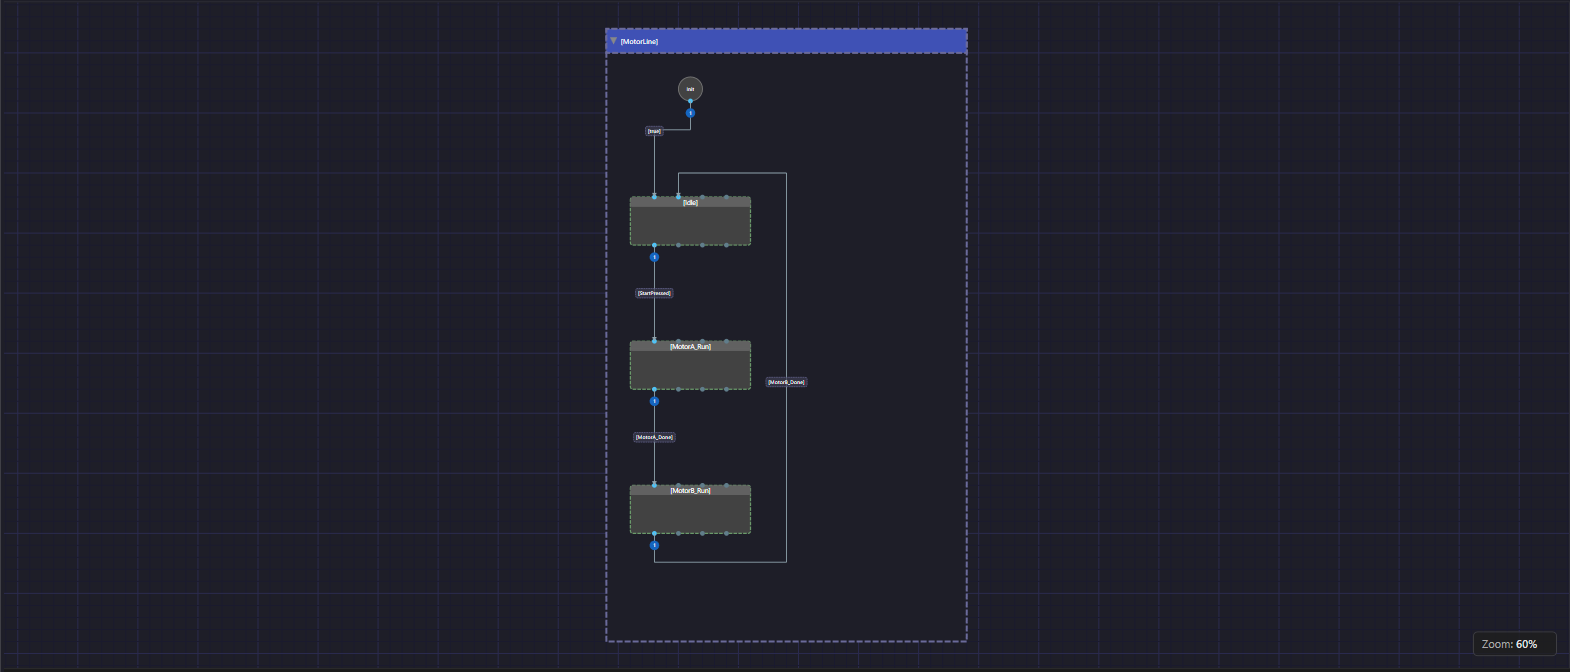
Idle takes the side lane rather than cutting through the states.Step 4 — Construct Composite
Everything so far is a drawing. Nothing exists on the States page, nothing exists on the Conditions page, and there is no composite in the Composite Composer. One command changes that.
Right-click the composite header and choose Construct Composite:
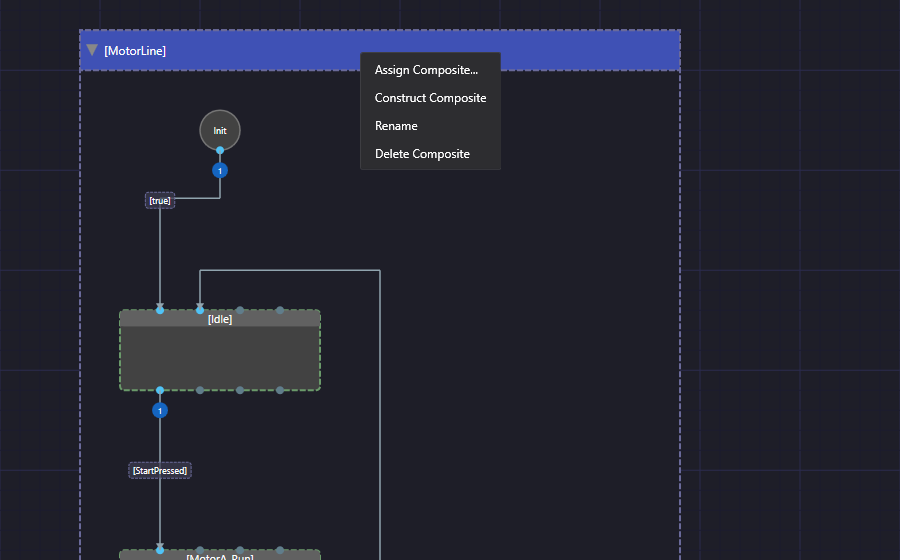
StateTick reads every placeholder name off the canvas and builds the real thing:
- Creates generic states
Idle,MotorA_Run,MotorB_Run. - Creates generic conditions
StartPressed,MotorA_Done,MotorB_Done. - Creates the composite
MotorLine. - Adds an instance of each state and condition to that composite, already mapped to its template.
- Re-points every node and wire on the canvas at the real thing it just made.
None of this is mandatory — it is the automatic route. You can build the same machine by hand: create each state on Generic Composer → States and each condition on Conditions, then go to the Composite Composer, make the composite, and add an instance of every state and every condition mapped to its template. Only then do you open the planner, drop the composite in, drop the states in and pick a condition on each wire.
Same end result. The difference is when you have to decide. The manual route asks for every part before you can draw the machine; Construct Composite lets you design the logic first — names on a canvas, arrows between them — and fill in the details once the shape is settled.
The drawing barely changes — which is the point. The brackets disappear, the borders go solid, and the wire labels resolve to real condition instances:
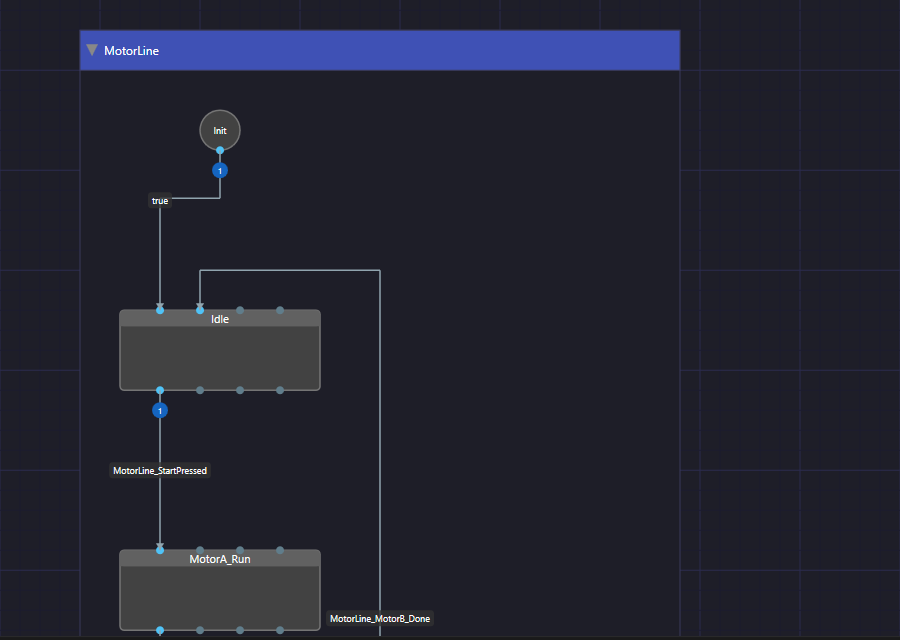
[StartPressed] became the condition instance MotorLine_StartPressed.Anything that already exists is reused, not duplicated. If a state called Idle is already on the States page, Construct Composite maps to it instead of making a second one. That is what makes it safe to run again later — on an assigned composite the same menu item becomes Add New Items, and it picks up only the placeholders you have added since.
Step 5 — See what it made
Go to Generic Composer → States. All three states are there, ready for you to fill in On Entry, Steps and On Exit actions:
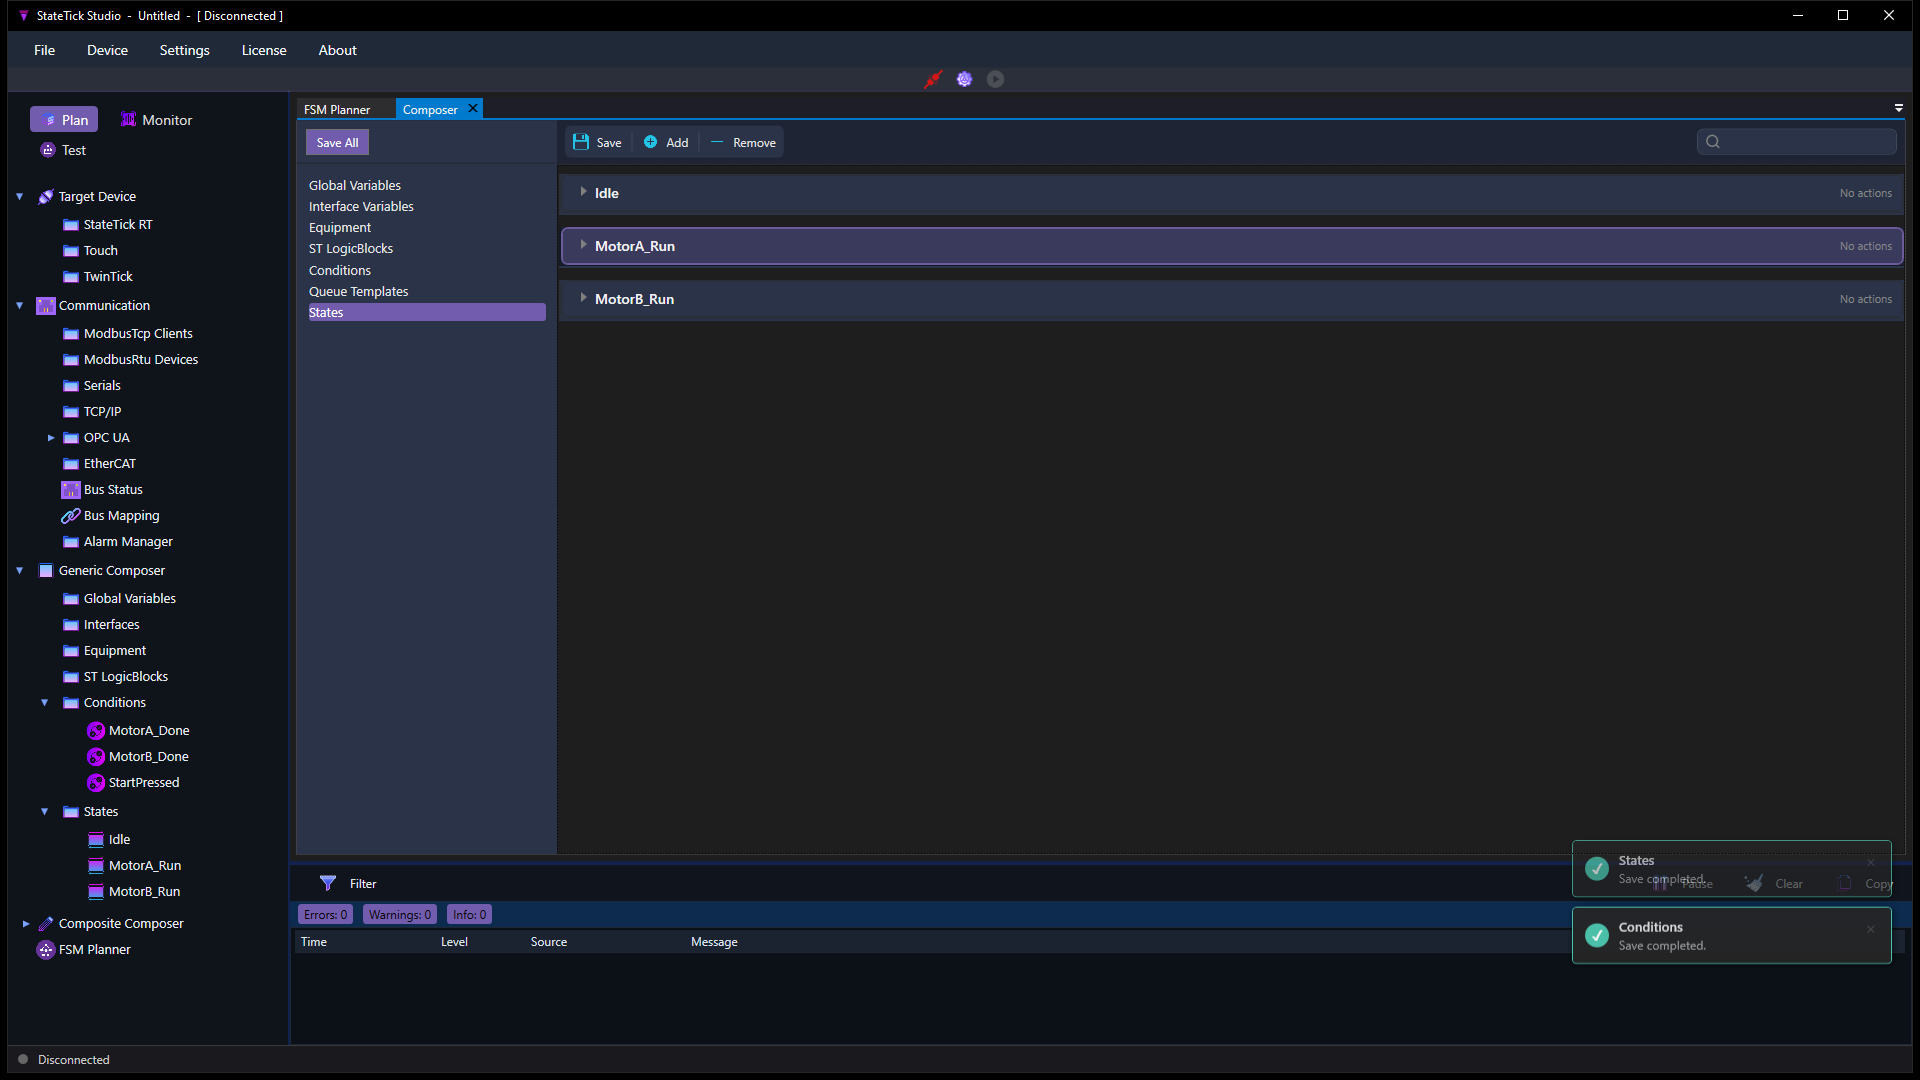
And on Conditions, the three guards you typed on the wires:
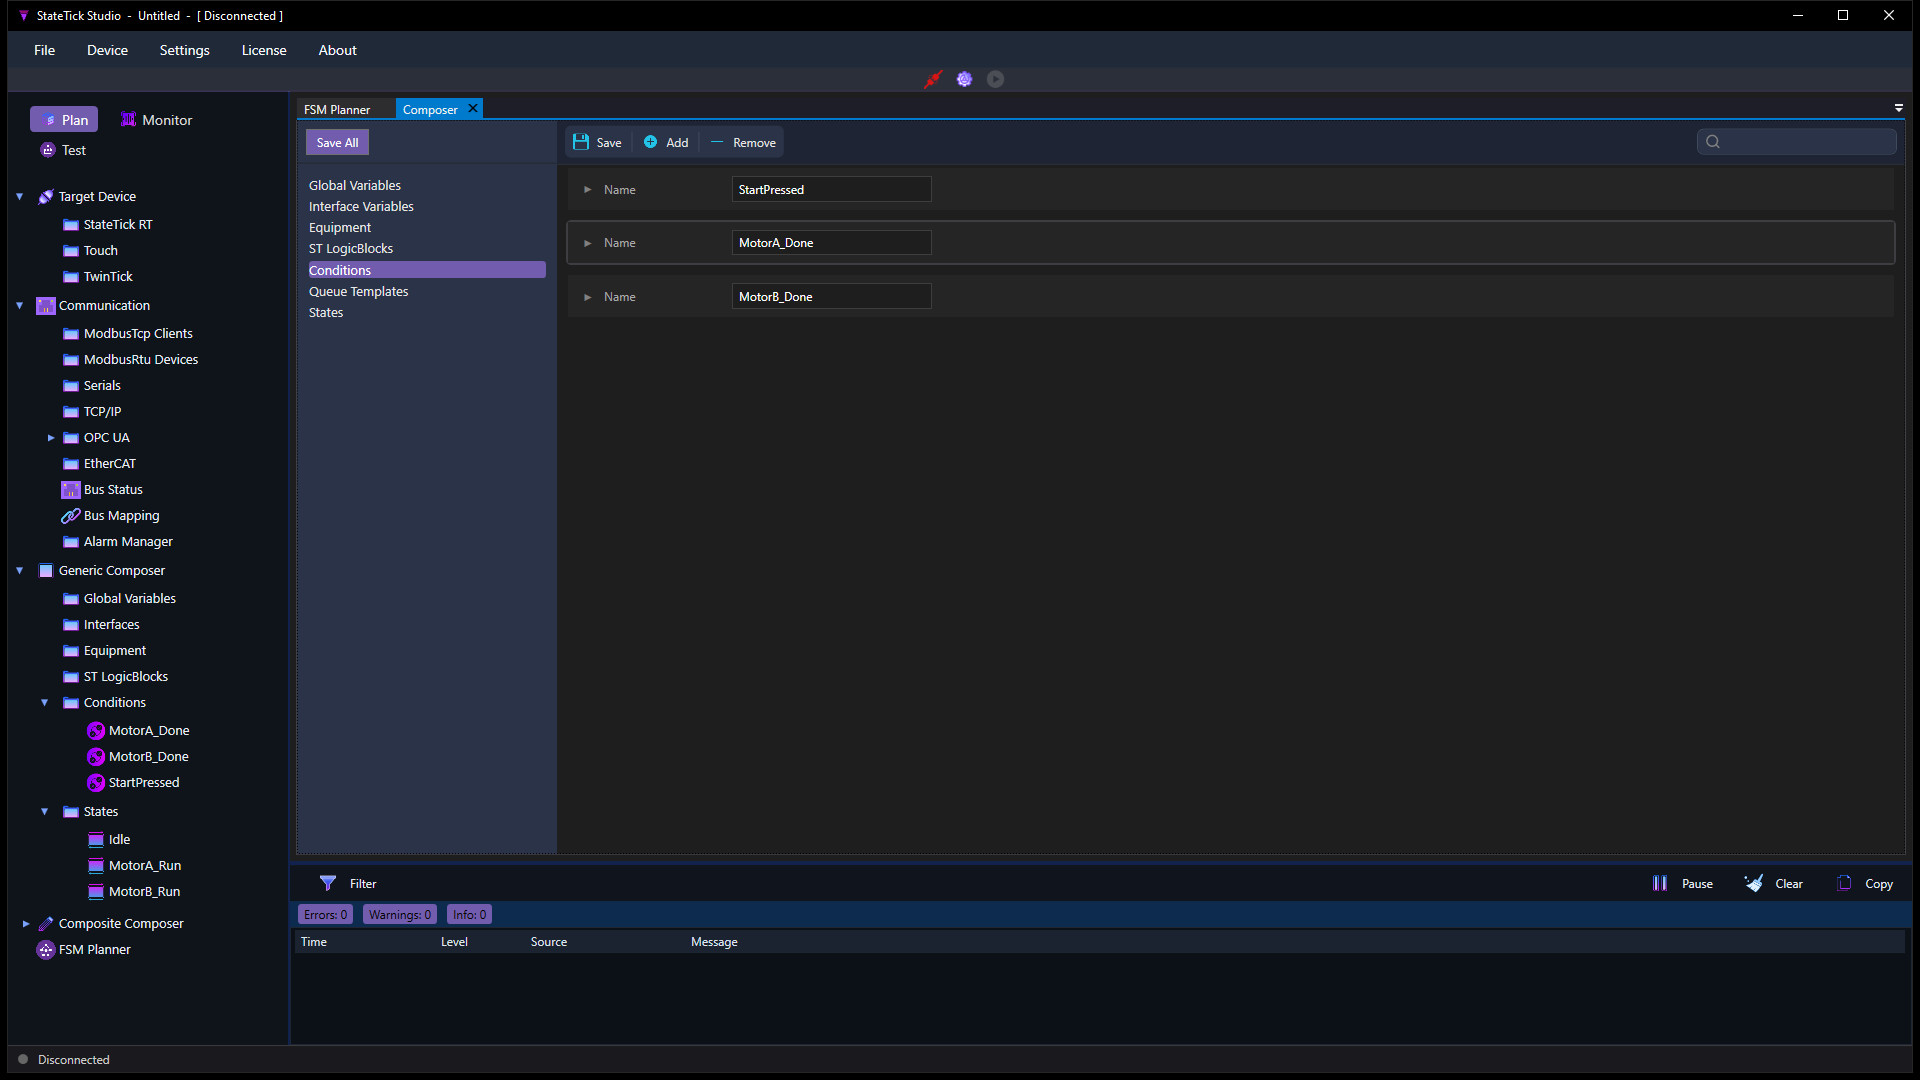
In the Composite Composer, MotorLine exists with every instance already mapped to its template:
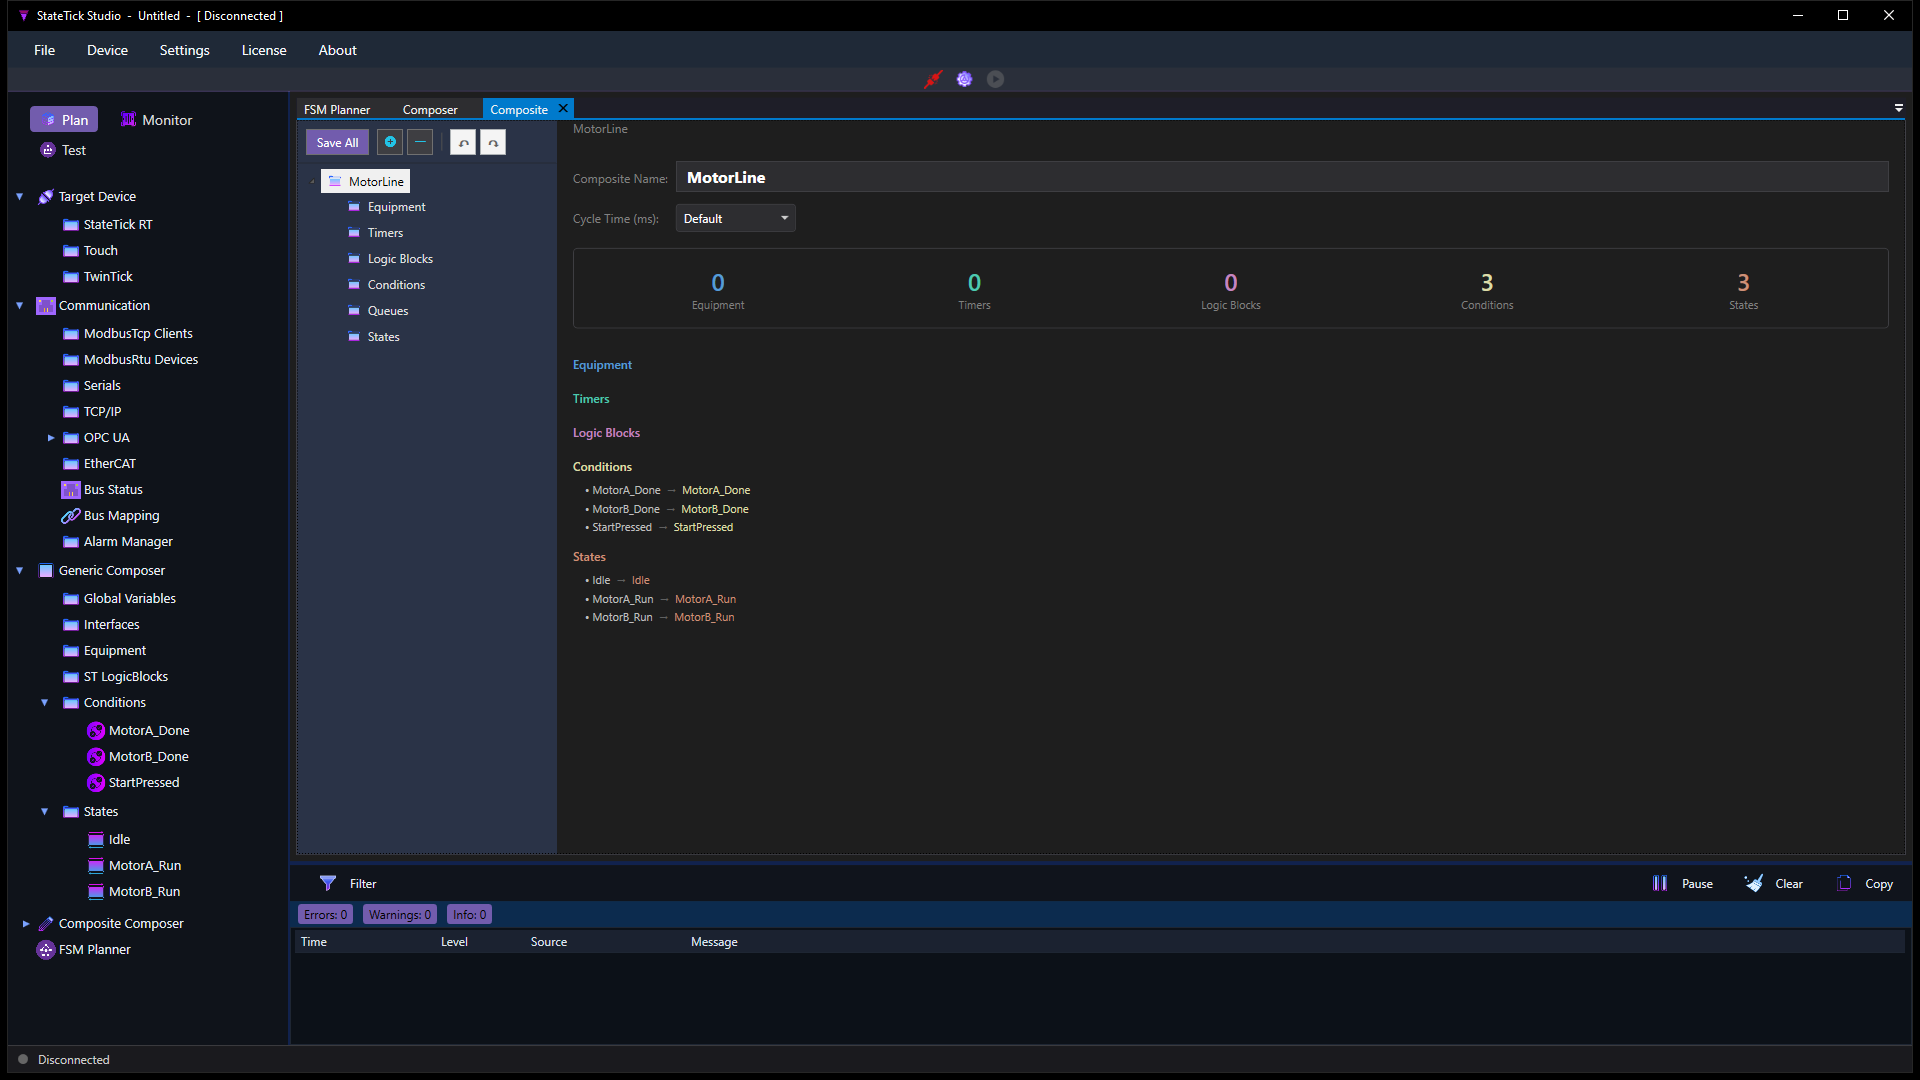
Expand one and you will find a single placeholder term rather than a real test — enough to keep the project valid, and a marker for what you still owe it. Replacing that with an actual term is your job.
What is not filled in is deliberate: the states have no actions and the conditions have no real logic. Construct Composite builds the skeleton — the shape of the machine. Putting a motor behind MotorA_Run and a sensor behind MotorA_Done is the next job, and it is the same work the States and Conditions tutorials cover.
Step 6 — Save the plan
Press Save in the planner toolbar. That writes the transitions into the composite's FSM — the part the runtime actually executes. Until you save, the drawing is just a drawing.
Why draw first
Both routes end in the same project, so the choice is about order. Building the parts first — every state, every condition, then the wiring — makes you commit to a structure before you can see it, and name each thing twice. Drawing first inverts that: you argue about the shape of the machine while it is still cheap to change, in front of people who do not use StateTick, and only then does anything get created.
It also means the drawing and the project cannot drift apart. The canvas is not documentation of the machine; it is the machine.
Try it in StateTick
Sketch your line on the canvas, press Construct Composite, and start filling in the parts.
Get Started →See also
- States in StateTick — fill the states this tutorial created with On Entry, Steps and On Exit actions.
- Conditions in StateTick — give each wire guard a real expression built from equipment and globals.
- The FSM Planner: a drawing your team can read — why the plan doubles as the document everyone reviews.